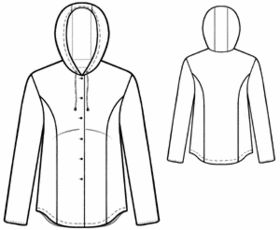
Home / Women / Maternity / #5606 Shirt with Hood

Difficulty: *
Attention! Fabric consumption varies depending on the size of garment. First of all, print out paper patterns and lay them out at the width of fabric/ knit you plan to use, to see how much fabric you will need.
When sewing the garment, pay attention to notches- they must coincide.
Recommended fabric: woven fabrics and knits of natural (cotton, linen, wool) fibers or blends (natural/artificial fibers).
You will need: fabric; fusible interfacing; 6 buttons; drawcord for hood(refer to your pattern for length), drawcord tips.
Cutting:
Shell fabric:
1. Center Back – 1 piece
2. Side Back – 2 pieces
3. Center Front – 2 pieces
4. Side Front – 2 pieces
5. Hood – 2 pieces
6. Center Hood – 1 piece
7. Sleeve – 2 pieces
8. Front Facing – 2 pieces
9. Back Neckline Facing – 1 piece
Fusible Interfacing: Front Facings, Back Neckline Facing.
Instructions:
1. Reinforce Front Facings and Back Neck Facing with fusible interfacing.
2. Sew front princess seams. Serge allowances; press them towards center front. Sew and serge back princess seams. Press allowances towards center Back.
3. Sew shoulder seams of Front Facings and Back Neckline Facing. Press allowances open. Serge inner raw edge (NOT center front/neckline edge) of Facings.
4. Sew and serge shoulder and side seams. Press seam allowances towards Back.
5. Sew Hood pieces to Center Hood piece, serge allowances. Mark placement of buttonholes at Hood as per pattern. Work buttonholes into Hood. Turn under wide allowance for tunnel at face edge of Hood, press. Turn under raw edge and topstitch the Hood to form a tunnel for drawcord.
6. Sew Hood into neckline of garment. Place Facings onto jacket, face-to-face, aligning and pinning at center front edges and neckline. Sew Back Neckline Facing and parts of Front Facings to the neckline. Sew Front Facings to Fronts at center front edges. Clip allowances in corners. Turn out to the face side. Press. Bartack or hand-sew Front Facings to shoulder seams.
7. Sew under-sleeve seams. Serge allowances and press towards back of Sleeve. Machine-baste at Sleeve head. Pull threads to make slight shirring of Sleeve head. Press shirring with a tip of hot iron through a wet cloth to smooth the shirring. Sew Sleeves into armholes. Serge armhole allowances.
8. Serge bottom edge of shirt. Turn under hem allowance, press and topstitch along the hem. Serge bottoms of Sleeves. Turn under hem allowances, press and topstitch along the hem.
9. Mark placement of buttonholes. Work buttonholes into right Front; sew buttons to left Front accordingly.
10. Insert and pull drawcord through the Hood tunnel. Put on tips and tie ends of cord into knots.